Wednesday, April 29, 2020

Real Rotisserie Chicken

I’ve been wanting to put a chicken on the spit for a while and the day had finally arrived.  I put “real” in the title, because most of the recipes I found cook it in the oven, on the grill, or in a slow cooker so I have to chuckle when a rotisserie is not involved in cooking rotisserie chicken.  I would like to have used a smaller, younger chicken (4# or less), but all we could find were 5½ pounders so being a little tough was a possibility.


I first brined the bird for about 20 hours using this recipe I found on Dinner AtThe Zoo.

Ingredients:
8 cups water
1/2 cup kosher salt - do not use table salt
1/4 cup honey
3 dried bay leaves
5 cloves of garlic smashed and peeled
1 tablespoon whole black peppercorns
1 tsp dried rosemary (3 sprigs fresh)
1 tsp dried thyme (3 sprigs fresh)
1 tsp dried parsley (3 sprigs fresh)
2 lemons sliced

Instructions:
1. Place the water, salt, honey, bay leaves, garlic, peppercorns, rosemary, thyme, parsley and lemons in a large pot. Bring to a simmer over medium heat.
2. Cook for 3-4 minutes or until salt has dissolved.
3. Turn off the heat and cool completely.
4. Add the chicken to the cooled brine making sure it is completely submerged and refrigerate for 8-24 hours.
5. Remove the chicken from the brine and rinse with cool water; pat dry with paper towels. 

To add more flavor to the chicken, I decided to use Chef Lea Ann’s recipe for rotisserie chicken spice mix from her Cooking On The Ranch blog.

Ingredients:
1 teaspoon Garlic powder
1 teaspoon Onion powder
1 teaspoon Dried Oregano
1 teaspoon Kosher salt
1/2 teaspoon Dried Thyme
1/2 teaspoon Dried Rosemary crushed
1/2 teaspoon Black pepper
1/2 teaspoon Chili powder 

1. I removed the chicken from the brine and fridge about an hour before cooking so it could air dry and warm up a little.
2. Thirty minutes before cooking, I combined all spices in small bowl. I loosened the skin with my hands to distribute mixture evenly between meat and skin of the breast and thigh and leg I could reach.  After a 20 hour brine, I was afraid to add any more salt to the bird so it got none in the cavity, in the spice mixture, or on the outside.
3. In looking at recipes for cooking on a spit (and there were very few), the suggested cooking time for a 4 lb chicken was 1½ -2 hours so I allowed 2½ hours for my larger bird.
4. After putting it on the spit, I tressed the legs, tied the wings to the body, and rubbed peanut oil over the outside.  
5. I started it cooking with the infrared side burner on high for an hour then lowered it to low for the remainder of the cook.  I put a pan under the chicken to catch any juices. 


6. At the 1½ hour mark, I used my Thermapen to begin checking the temperature of the breast, by inserting the probe into the thickest part of the breast from the neck end of the bird so as not to puncture the skin and allow juices to escape.


7. It achieved the desired 160F breast temp at the 2¼ hours so I turned off the burner and let it rest about 10 minutes in the grill.  


8. Then I moved it to a cutting board, removed the spit and carved it for eating.

We sided it with some asparagus from our garden that we steamed then tossed with some melted butter and topped with fresh Parmesan cheese and a Bev salad using beautiful fresh greens from our Sat trip to the Mennonite market.  This is my plate.


We all thought it was delicious and Bev said “she hated to admit that it was better than store bought and her breast was melt in my mouth tender” - which was a big relief.  Cindy just oohed and aahed over her thigh.  I ate a leg and two wings and the wings were too salty but Bev and Cindy didn’t think theirs was as they don’t eat the skin.  My leg was a little salty as was the bite of breast I tried so next time, I’ll use the same recipe but only brine for about 12 hours and see what we get.  Lea Ann’s spice mix was excellent and will be the go-to from now on.  Thanks Chef.

While this cook won't totally deter us from the convenience of store bought rotisserie chicken (now I wonder how they are cooked), it will at least give us pause to consider cooking our own and since this one was so tender, I'll now want to get the bigger birds.

Photos can be enlarged by clicking on them and the blue words are links.

Have a great day and thanks for stopping by Almost Heaven South.

Larry

4/19/20 event date

Monday, April 27, 2020

Fish Tacos – Baja Style

Friday was once again fish day and we had the ingredients for Baja Fish Tacos.  My understanding is that fish tacos originated in Baja, California and Baja Style means the taco should contain, at least, fried white fish, shredded cabbage, and creamy white sauce.  This shot is from the food.com site and are not nearly as full as ours.


The sauce recipe we used came from Vickie on her no longer in use blog and I made it up ahead - this is a half recipe and I omitted the strike thrus.

Fish Taco Sauce

Ingredients:
¼ cup sour cream
¼ cup mayonnaise
½ lime, juiced
½ jalapeno pepper, minced
½ tsp. minced capers
¼ tsp.dried oregano
¼ tsp. ground cumin
¼ tsp. dried dill weed
1 tsp. ground cayenne pepper

Directions:
Mix everything together and refrigerate for a few hours for flavors to marry.

For our tacos, we got a couple packages of crappie fillets from our freezer and used the recipe from Food.com with a few changes.  The following is a half recipe of batter and it provided plenty for our 16 pieces of fish.  The original recipe can be found by clicking on the link.

Fish Tacos – Adapted from Food.com

Ingredients:
1 cup self-rising flour
¼ teaspoon garlic powder
1⁄4 teaspoon cayenne
¼ teaspoon dry mustard
¼ teaspoon dried whole Mexican oregano, rubbed to a powder
6 oz cold beer, more or less for desired batter thickness
16 crappie fillets
S&P
vegetable oil (for deep frying)
6” corn tortillas
Shredded cheddar cheese
Bev’s pico de gallo – tomato, cucumber, onion, lime juice
Shredded cabbage

Directions:
1. Make the batter: Whisk the flour, baking powder, garlic, cayenne, mustard, and oregano until well blended. Stir in the beer until there are no lumps. (Batter may be made several hours ahead and refrigerated).
2. Dry the fish and season with S&P.
3. Pour the oil into a deep, wide pan to a depth of 2 inches and heat to 350 degrees.
4. Dip the fish in the batter, allow excess to run off, and lay the fish gently into the hot oil. 
5. Cook until golden brown, flipping as needed. Just a couple of minutes per side were sufficient.
6. Remove the fish to a rack to drain.
7. To serve, hold a tortilla in your hand and spread a spoonful of sauce over one side. Top with fish, cheese, cabbage, and pico de gallo. 

It would have been nice to have guac and some cilantro. 


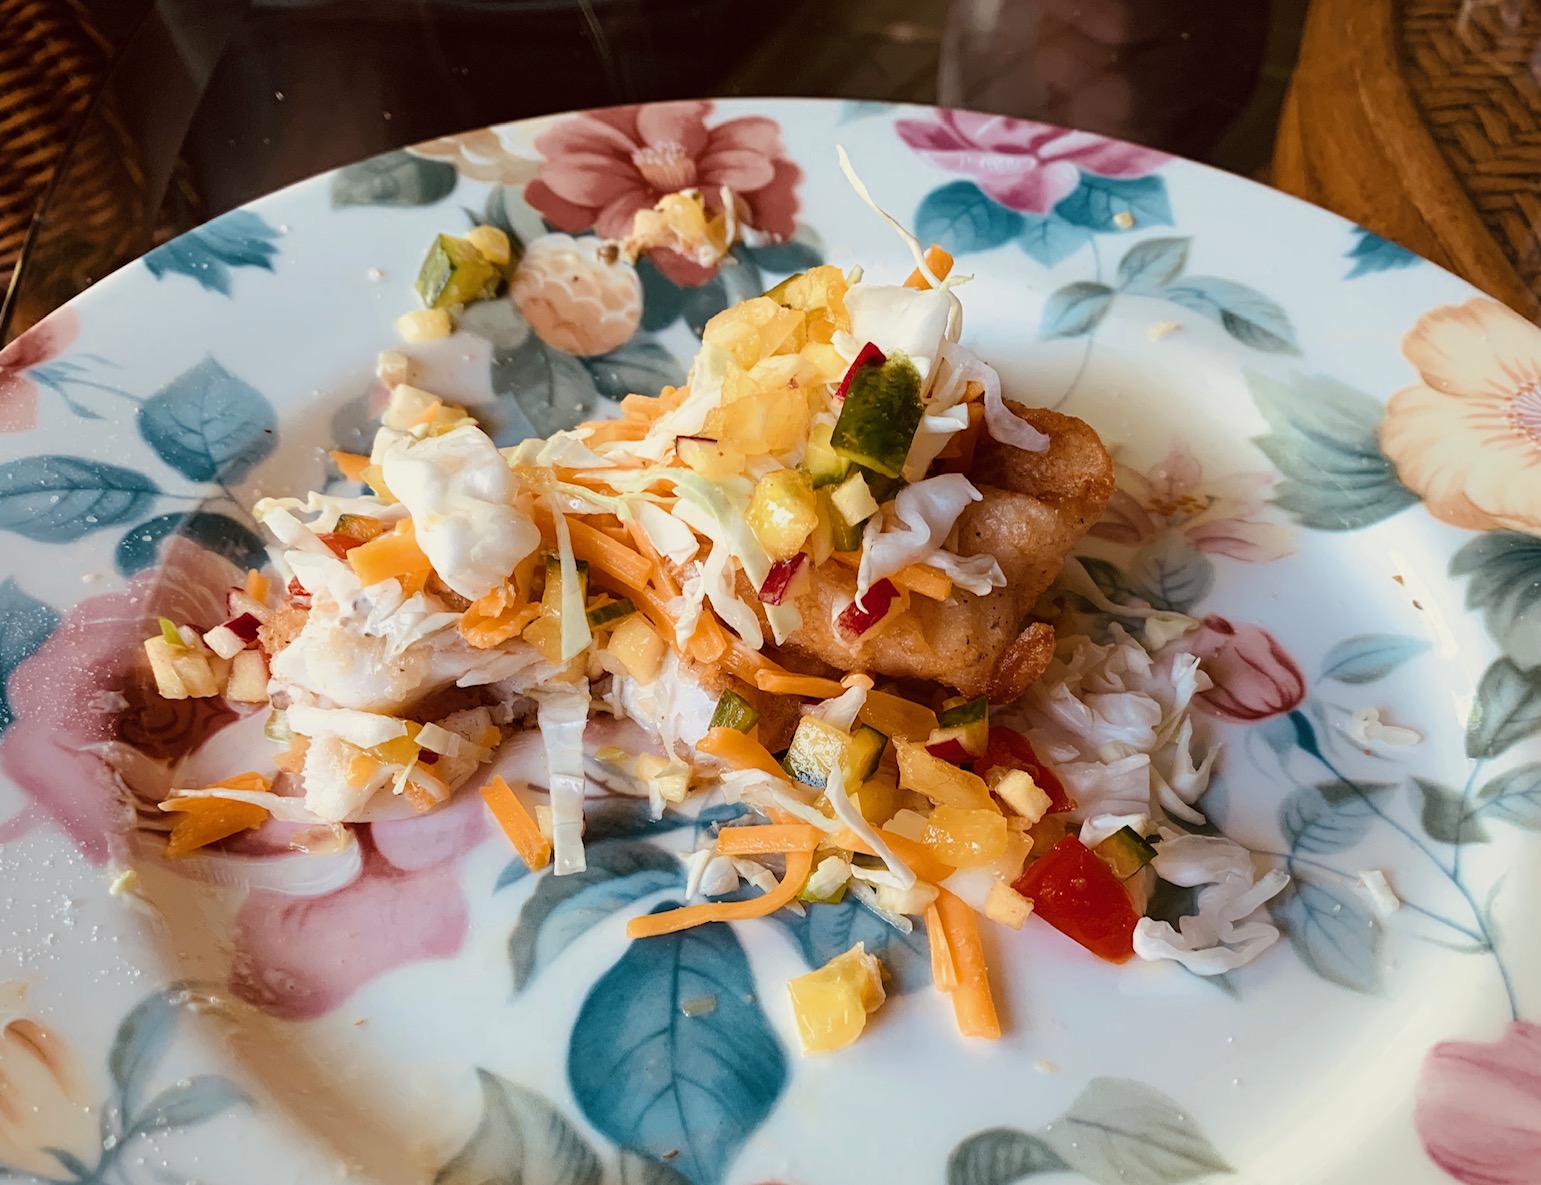
But they were still great, and I do mean great, and everyone else agreed – had we had an avocado for guacamole, they would have been fantastic and I can hardly wait to make them again.  As you can tell from the above shot, one fish fillet more than filled the tortilla.

After eating my two tacos, I could not resist just adding the toppings to a remaining piece of fish and eating it with a fork.  I remembered the shot after a couple of bites.


I wish we'd gotten more photos but we got to busy cooking fish and building tacos as it came off, then eating of course.  But I did get a shot of my Saturday morning breakfast - the batter didn't crisp up as nice as when fresh but it was still delicious and went well with a couple of scrambled eggs.


I know, you were expecting fish with fried eggs on top but this worked very well and what a great way to begin my day.  Bev had another taco and she almost never eats fish for breakfast so that tells me how good they were.

Photos can be enlarged by clicking on them and the blue words are links.

Have a great day and thanks for stopping by Almost Heaven South.

Larry

4/17/20 event date

Saturday, April 25, 2020

Teriyaki Pork Stir Fry

When we made chicken stir-fry a week ago, Bev said she loved it and wanted to have again soon so we decided stir fry would be a good weekly meal to provide for our friends with the invalid son.  But for this meal, Bev wanted to use pork so I went for an online search and found a recipe for Teriyaki Pork that didn’t require buying any special ingredients.  It came from Dinner At The Zoo and I adjusted the ingredients list a little and used some frozen vegetables we had on hand and I changed the directions around.  You can click on the link for the original recipe and more good pics like this one.


Thursday, April 23, 2020

Birthday Meals For My Honey

For breakfast in the past year, we've had a ham, mushroom and asparagus frittata and a ham and asparagus strata but for this meal I wanted to keep the cooking simple so I made a scramble to use some asparagus stem pieces that I had left over.  I was planning to just add this meal to a later post of several meals but it was so good, I thought I’d better document it with a separate post.


Asparagus stem pieces you might ask - many people bend their asparagus until it snaps knowing the flesh above the break will be tender but I discovered that some of the flesh just below the break is often still tender enough to eat so that is what I used here.

Tuesday, April 21, 2020

Open-Faced Egg Salad Sandwich with Bacon and Chives Ala Pam

You may not realize this, but I love eggs and don’t believe I’ve yet to meet one I didn’t like and that includes those made into egg salad.  My go-to breakfast is simply a toasted English muffin topped with a couple of fried eggs with the occasional addition of meat or cheese.  So when Pam posted the recipe for Open-Faced Egg Salad Sandwich withBacon and Chives on her For The Love Of Cooking blog, I saw it as a kicked-up version of my go-to and knew it had to be tried.  Click on the link for shots of Pam's and her original recipe.

While I wanted to use Pam’s sandwich construction, I wanted to use a little different version of egg salad using this recipe (adapted for 12 eggs) from Spend With Pennies which is more like our normal one.  You can click on the link to get Holly’s original recipe and more pics like this one.


Sunday, April 19, 2020

Cajun Fried Cabbage And Sausage For Supper And Asparagus For Breakfast

After seeing Pam’s post for fried cabbage with bacon, I planned to use the head we had in the fridge for it but then Bev suggested we use the package of Cajun smoked sausage that had been in our fridge for several months instead of the bacon.  Since I had been wanting to use it myself, I went online and searched for Cajun fried cabbage with sausage and to my surprise I found several.  I selected the one from Cajun Cooking Recipes then made a couple of changes to get the recipe below – I browned the meat and used some creole seasoning.  You can click on the above link for the original recipe and the first link for Pam's recipe.


Friday, April 17, 2020

Easter Dinner Ala Cindy And Happy Hour

With rain all day and severe storms that night, it sure wasn’t your classic beautiful Easter Sunday, but we couldn’t go anywhere so it didn’t affect us much.

As the devout Catholic in the house, Cindy has always considered Easter dinner a very special meal and she wanted to do the cooking.  Her menu was based on what we had on hand and was to be ham, potatoes, salad, homemade bread, and dessert.  Cindy at work in our messy kitchen.