Tuesday, August 14, 2012

Shake-Down RV Trip To Georgia

Before we make longer trips, we decided to take a little 3-day shake-down trip to Vogel State Park located 11 miles south of Blairsville in the mountains of northeast Georgia.  We chose this location for it's proximity to the local wine country since tasting is a favorite activity of ours.

We ended up with a very nice site except it only had 30 amp power which restricted us to one air conditioner unless we ran the generator, but fortunately it cooled off at night and we learned how to make it work – the purpose of the trip.


This is our campsite and it was nicely laid out, level, totally shaded, across the street from the bathhouse, and with no close neighbors.

Of course the first night, we had the requisite hard rain – seems to be a requirement when we camp.

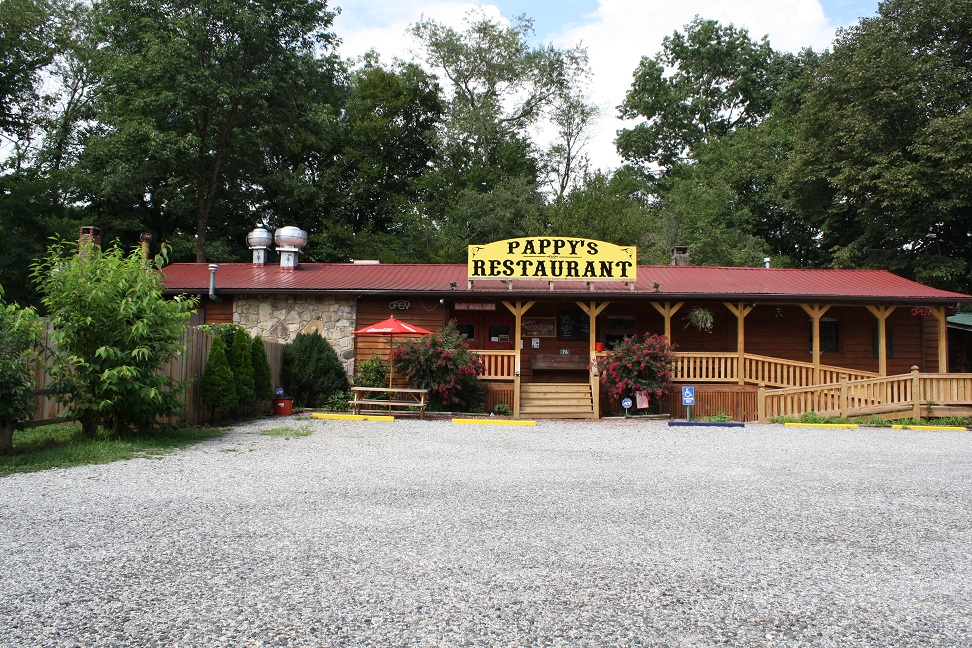
The first evening we went to dinner at a nearby place called Pappy’s Restaurant. located the a small tourist village of Pappy’s Trading Post, which contains several shops along with the restaurant.

I had fried trout with beans and potato salad and the girls split a burger.  Other than the sour cream and horseradish potato salad, our meals were good but nothing special, and we tried our first ever Brunswick Stew - won't have to do that again.  But they did give me a little sample of their pulled pork BBQ, which I thought was very good and went back the next night for some to take back to the RV for supper (since I’m usually disappointed, I rarely eat BBQ anywhere but home).

All photos can be enlarged by clicking on them.

Have a great day and thanks for stopping by Almost Heaven South.

One year ago:  None


Larry

8/6/20102 event date

Monday, August 13, 2012

A Texas Hot Link Breakfast

I was digging around in the freezer the other day and came across a package of homemade sausage.  I made it using the Czech spices from Novak’s Meat Market in El Campo, Texas to which I'd added chopped jalapenos and high melting-temperature cheddar cheese.

I grilled them all, ate one for lunch on a bun with homemade kraut and the next morning, used the second one for a simple breakfast sandwich with just scrambled eggs and mayo.

It was delicious and I’m sure glad I found them.

All photos can be enlarged by clicking on them.

Have a great day and thanks for stopping by Almost Heaven South.


Two years ago:  Naan Bread Is Good Eats

Larry

8/4/2012 meal date

Saturday, August 11, 2012

Saturday Humor - Mr. Gorsky

On July 20, 1969, as commander of the Apollo 11 lunar module, Neil Armstrong was the first person, in case you didn't already know, to set foot on the moon.

His first words after stepping on the moon were, "that's one small step for man, one giant leap for mankind," and they were televised to earth.  But just before he re-entered the lander, he made the enigmatic remark, "good luck, Mr. Gorsky".

Many people at NASA thought that it was a casual remark, concerning some rival soviet cosmonaut.  However, upon checking, there was no Gorsky in either the Russian or American space programs.

Over the years, many people questioned Armstrong as to what the “Good luck, Mr. Gorsky” statement meant.  But Armstrong always just smiled.

On July 5, 1995, in Tampa Bay, Florida, while answering questions following a speech, a reporter brought up the 26 year-old question to Armstrong.  This time he finally responded.  Mr. Gorsky had died, so Neil Armstrong felt that he could now answer the question.

In 1938, when he was a kid in a small mid-western town, he was playing baseball with a friend in the backyard.  His friend hit the ball, which landed in his neighbor's yard, by their bedroom window.

His neighbors were Mr. and Mrs. Gorsky.  As he leaned down to pick up the ball, young Armstrong heard Mrs. Gorsky shouting at Mr. Gorsky: sex! You want sex?! You'll get sex when the kid next door walks on the moon"!

Have a great day and thanks for stopping by Almost Heaven South.


Larry

Friday, August 10, 2012

Tri-Tip With Pam’s Beans and Roz’s Salad

We wanted to have a fairly low-cal meal and this seemed to fit the bill.  I had a tri-tip in the freezer and after thawing, I gave it a thin coating of beef base and a nice coating of Montreal Steak Seasoning – no additional salt or pepper needed.

I grilled it indirect to a temperature of 100*, flipping it once, then over direct heat for crust establishment to 120*, flipping it at 110*.

Bev had picked a small basket of filet beans and blanched them all, part of which were wrapped in bacon and frozen for later use.  We had enough to make Pam’s (Pam’s Country Kitchen) recipe for Braised Green Beans.  I used smoked chicken broth and followed the recipe except I added several sprigs of thyme to the broth from-the-get-go to be sure the broth got the flavor – since I wouldn’t need to cook the blanched beans as long.

Finally was the Summer Salad with Cherries, Prosciutto, Goat Cheese and Balsamic Vinaigrette posted by Roz over at La Bella Vita.  Even though Bev forgot the onion and the cheese, it was still very good, so I can’t wait to try it again with the all of the ingredients.  (We had two nights later with everything and it was even better).

This is my plate:

As usual, making a sauce or aioli didn't even occur to me.  I'm a total flunk-out from Jenn's Creating a Unique Sauce to Compliment Most Meats School (Jenn's Food Journey).

When my buddy Joe came over the next day so we could go get a load of wild cherry wood for BBQing, we made sandwiches from the leftover tri tip.  I sliced it thin and reheated in au jus made from beef base and water and I sautéed some onions and peppers.  Bev sliced the buns, added a slice of provolone, and warmed them then I added the meat, veggies and a few spoons full of au jus.

They were a delicious way to use the leftovers.

All photos can be enlarged by clicking on them.

Have a great day and thanks for stopping by Almost Heaven South.


Larry

8/1 & 8/2/12 meal dates

Thursday, August 9, 2012

Olympics – Something For Everyone

I grew up at a time when the Summer Olympics were more of the traditional athletic events, leaning heavily toward track and field and the competitors were amateurs or at least supposed to be.  I believe allowing professional athletes leveled the playing field, especially for the USA, as all countries can now send their best to the games.

When watching them as a kid, I pretty much always felt I was watching a competition of athletes – the best in the world.  Now I see such events as synchronized swimming, ping pong, badminton, and archery (re-added in 1972) and have a hard time overcoming my bias and thinking of the participants as athletes – the same could be said for other events as well.  But I’ve never done them at the world class level and feel sure the badminton competition looks pretty different than our back yard games.

Having said all of this, I’m now able to look at the games as a collection of events where the best-in-the-world competitors (athletes or not) come together every four years to show their skills, see who really is best, develop national pride, re-develop part of a big city, and hopefully make money for the host city.

In looking over the events, there seems to be something that all but a hermit can enjoy watching, so I just watch the ones I like and pass on the others.  It’s great being able to overcome my bias and look at something from a different perspective – one down, thousands to go, and so little time J.

All photos can be enlarged by clicking on them.

Have a great day and thanks for stopping by Almost Heaven South.

One year ago:

Two years ago:

Larry

Wednesday, August 8, 2012

Fried Zuchinni and Eggplant Taste Test

A few days after the eggplant/zucchini casserole, the neighbors came for dinner and we served fried eggplant and zucchini that was coated the same as my July, 11 post for Eggplant Parmesan .  After flipping, I topped them with sliced mozzarella, plated, sided with spaghetti, and topped with everything homemade sauce.

Some liked the eggplant and some preferred the zukes, but everyone thought both were delicious.  Both veggies are still producing in the garden, so I feel another batch of ratatouille coming on.

Using a recipe from Bon Appetit, Bev made these nice little appetizers of procuitto, melon, mozzarella, and basil leaves with a drizzle olive oil/basil sauce.

I liked them with or without the sauce.

All photos can be enlarged by clicking on them.

Have a great day and thanks for stopping by Almost Heaven South.

One year ago:  Tomato Tasting 2011

Two years ago: Stewed Okra And Tomatoes

Larry

7/27/12 meal date

Tuesday, August 7, 2012

Canning Tomatoes 101

As we become more discerning about what we eat and opt to buy fresh from the Farmers Market rather than the grocery store, it’s often said that “I wish I could get this in the winter.”  And while it’s nearly impossible to do unless you live in a temperate region, many items can be preserved for winter use and a big one for us is tomatoes, which we make into canned tomatoes, juice, and sauces.

Believing that many are intimidated by the prospect of canning, I thought I’d put together a little tutorial on preserving tomatoes using a pressure canner – it’s a lot quicker than a water bath canner.  My primary reference for preserving is “Keeping The Harvest” by Chioffi & Mead.

Jars – use only canning jars and not left over mayonnaise jars. 

Check them for any damage that could lead to breakage or nicks on the rim that would prevent sealing.  We just wash ours in the dish washer but they can be further sterilized by dipping in boiling water (more of a concern for low acid items like beans).

Tomatoes – We like to can with paste tomatoes (Kada, Quimbaya, Roma, San Marzano, etc.) as they have much less water in them, which must often must be cooked off later for sauces and they make a little thicker juice.  It takes a peach basket full (half bushel) to make a run (seven quarts).

More watery tomatoes work fine in soups but the more water you can, the more jars and shelf space it requires. 

For canned tomatoes, we cut out damaged areas (such as this spot caused by the fungus anthracnose, as seen on the one tomato below), blanch, ice water cool, and peel them. We then quarter them, squeeze out some of the water, and pack in jars, with 1 tsp. of canning salt - don't use table salt.


For juice, we core and remove bad places, then cook until soft enough to process – longer cooking will give them a different taste with less of a fresh tomato flavor.  We run them thru a chinois

and add the juice to jars (stirring the pan often to prevent water separation), with a tsp. of canning salt.  Use a canning funnel to keep the jar tops clean. .

For sauces, we do the same thing to the maters as for juice but have recently learned to simmer them all night before running them through the chinois.  We also tried a run of juice this way.  On our cooktop, we have to set the pan on a simmer plate to keep them from boiling. 


Bev used the food processor to chop some garlic (2 bulbs), onion (4 medium), celery (5 stalks), sweet pepper (3 med bells), and carrot (3 med) very fine and added it to the tomatoes (12 quart pot full) before cooking – adjust amounts to your taste.  This resulted in a basic tomato sauce that can now be used for Italian, Greek, and Mexican sauces depending upon the herbs and spices that are added at the time of use.

From right to left, here is a jar of tomatoes (cooked the least), regular juice, and cooked-all-night-juice (cooked the most) - note the more they're cooked, the darker the color.  We tried the cooked-all-night juice as an experiment, but it tasted more like sauce than juice so we’ll use it for soups and other cooking – now I know why Dad told me not to overcook the maters when he was training me, but you know us kids, we have to learn it the hard way.


To prepare the lids, boil some water in a sauce pan, turn off the heat and add the lids – rapidly boiling the lids can damage to seals.  I put my lids front-to-back-to-front so they don’t stick together. 

I stick my tongs in there as well to sterilize them.

After putting the product in the jars, run a wet paper towel around the rim to be sure it is clean and there are no nicks.  Then set the lids in place and tightly install the rings, whose sole purpose is to hold the lid against the jar rim until it seals.

Canner – We use a 16 quart Presto Pressure Canner (dial type) which will process seven quarts of product and there is nothing to fear from these devices unless you try to use in from another room, which is a bad idea once it starts building pressure.  Always read the instructions with your canner.

To can the tomatoes, add two quarts of water (depends on canner size) to the canner containing the lifting basket, which also keeps the jars from sitting on the canner bottom (important). 

Then sit the jars into the canner with a little gap between them if possible, and add the lid, after checking the seal to be sure it’s properly in the slot for it (over time, the seals have a tendency to get smaller and won’t seal properly – our local hardware store has replacements for about six bucks). 

Once the lid is on, turn on the stove heat as hot as possible and after about 10 minutes, steam should begin to come lightly from the vent, set a timer for 10 minutes (you can read the paper during this period as well as the previous 10 minutes).  After 10 minutes steam should be shooting from the vent in a steady stream and the jiggler is now put on the vent – you now are confined to keeping an eye on the canner.

When the pressure gets to 11 lbs., start a 10 minute timer (for tomatoes) and throttle back the heat to medium and watch the gauge, making minor corrections to maintain around 11 lbs.  (After 5 minutes it will usually stay close to the 11 lb. mark).  A gas range works best as the heat adjustments are immediate. If using an electric range, the canner may need to be moved to a different eye on medium heat to prevent the canner temperature from overshooting the 11# mark too much – 1 pound for a short time is okay.

When the timer goes off, turn off the heat and go read the paper – DO NOT OPEN THE CANNER UNTIL THE PRESSURE IS ZERO or bad things will happen - also don't run cold water on it to speed the process, like you might do with a pressure cooker. 

When the pressure gage reads zero, remove the canner lid (back side first so the heat goes that way), remove the jars with a jar lifter

and sit them at least 1” apart to cool and you’ll hear them sealing over the next several minutes.  Once the lids seal and the jars are cool, I like to remove the rings and test the seals by giving them a little pull with my finger – you will not be able to open a properly sealed jar with your finger – unless you are mighty man. 

Since we have too many rings and they are a pain to store, I run them through the dish washer, wipe the jar threads and lightly reinstall the ring – like I said this is just for storage. 

Some folks just leave them on after canning but this is unnecessary for properly sealed jars and requires lots of rings.  You really only need enough rings for a canner load or two, and we trash them when they get some rust as they are more difficult to get on and off.

Starting with clean jars and pre-washed tomatoes, it takes 2- hours total time to do a run of tomatoes - juice takes about 3½ as the tomatoes require about two hours to cook. 

All photos can be enlarged by clicking on them and I can't figure out why I have two different type sizes.
  
Have a great day and thanks for stopping by Almost Heaven South.

One year ago:  None


Larry

July, 2012 event date